
A PSU matters more than most upgrades: it determines whether your PC boots cleanly, stays stable under spikes, and keeps components protected. To choose correctly, calculate realistic wattage with headroom, understand what 80 Plus really implies, verify +12V capacity and continuous power, then pick cable type (modular or not) for airflow and serviceability-follow a safety checklist before first power-on.
Executive summary: why your PSU choice dictates system stability
- Size the PSU from your real load (CPU + GPU + the rest) and add practical headroom for transient spikes and future upgrades.
- 80 Plus is an efficiency label, not a quality guarantee; use it to estimate heat/noise and operating cost, not "stability".
- The +12V rail capacity is what feeds CPU/GPU; compare amperage/wattage on the label to your expected load.
- Prefer "continuous" rated power at normal operating temperature; ignore marketing "peak" numbers for sizing.
- Modular cables can improve airflow and troubleshooting, but only when you keep cable compatibility strict (never mix brands/series).
- A short pre-boot safety routine prevents the most common PSU-related failures: wrong cables, loose EPS/PCIe plugs, and shorts.
Calculating real power needs: how to size a PSU for your build
This approach fits intermediate builders who know their CPU/GPU model and can read basic specs. Don't DIY-size if you're building a workstation with multiple GPUs, heavy overclocking, or unknown second-hand parts-use a vendor compatibility list and prioritize a higher-tier PSU line instead of chasing minimum wattage.
Quick sizing method (practical):
- Start with CPU + GPU typical load: Use the CPU's sustained package power under your workload and the GPU's board power (or typical gaming draw), not just "TDP".
- Add the platform budget: Motherboard, RAM, NVMe/HDDs, fans, USB devices-treat it as a single extra block.
- Add headroom: Choose extra margin to handle transient spikes, capacitor aging, and upgrades.
Example (single-GPU gaming PC): If your GPU is ~300W in games and CPU is ~125W under load, and you reserve ~75W for the rest, your base is ~500W. Add headroom and you land in the 650-750W range. That's the practical answer to คำนวณวัตต์ PSU ต้องใช้กี่วัตต์ for many modern mid/high gaming builds-final choice depends on your specific GPU tier and upgrade plans.
| Build profile | What to sum | Recommended headroom | Typical PSU pick range |
|---|---|---|---|
| Mainstream office / light creator | CPU iGPU or low-power GPU + platform | Moderate | Quality 450-550W |
| Single-GPU gaming (mid/high) | GPU board power + CPU sustained + platform | Higher (spikes + future GPU) | Quality 650-850W |
| High-end GPU / power-hungry CPU | Higher GPU + higher CPU + platform | High | Quality 850-1000W+ |
Interpreting 80 Plus ratings and real-world efficiency
What you need before you compare a พาวเวอร์ซัพพลาย 80 Plus ราคา:
- Your expected load zone (idle, typical gaming/creator load, worst-case).
- Case airflow and ambient temperature expectations (hot rooms and tight cases stress PSUs).
- Connector requirements (EPS 8-pin for CPU, PCIe 8-pin or 12VHPWR/12V-2x6 for GPU) so you don't buy the wrong cable set.
- Basic terminology (one-line definitions):
- Efficiency: how much wall power becomes DC power; higher efficiency usually means less heat at the same load.
- Ripple: unwanted voltage fluctuation on DC rails; lower is better for component stress (you won't measure it without lab tools, so rely on reputable PSU lines and reviews).
- Hold-up time: how long the PSU keeps outputs stable during a brief power dip; important in areas with unstable mains.
How to use 80 Plus correctly: Treat it as a heat/noise and operating-cost indicator at common load points. Don't treat "Gold" or "Bronze" as automatic reliability-platform design and protections (OCP/OVP/OTP/SCP) matter more, especially when you ซื้อ PSU คอมพิวเตอร์ for a GPU-heavy build.
Reading rails, +12V capacity and continuous vs peak power
-
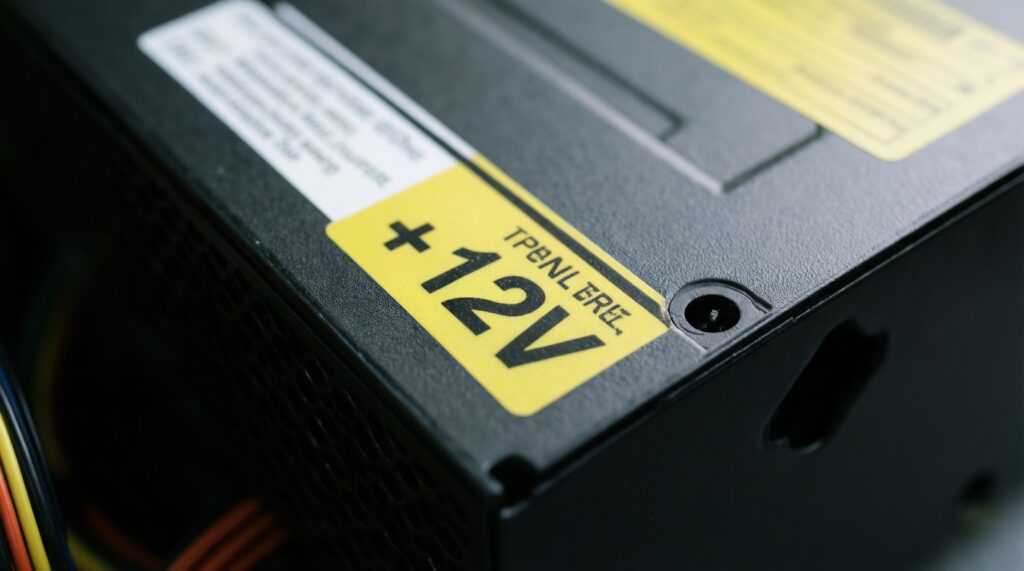
Find the PSU label and focus on +12V
On the side label/spec sheet, identify the +12V rail section. CPU and GPU power comes almost entirely from +12V, so this number matters more than combined 3.3V/5V in modern PCs.
-
Convert +12V amps to watts (or verify the stated wattage)
If the label lists +12V current, multiply: 12V × amps = +12V watts. Your +12V watts should comfortably cover your estimated CPU+GPU+platform under load.
- If it already states "+12V = XXXW", use that directly.
- Be cautious if the +12V wattage is noticeably lower than the advertised total wattage-modern systems need strong +12V.
-
Prefer "continuous" rated power; ignore "peak" for sizing
Size using continuous output at normal operating temperature (as specified by the manufacturer). "Peak" is a short burst figure and doesn't guarantee stability in sustained gaming/rendering loads.
-
Check connector count and type before you buy
Match PSU connectors to your hardware: enough EPS for the motherboard (often 1-2), and the correct GPU connectors (multiple 8-pin, or a proper 12VHPWR/12V-2x6 cable if your GPU requires it).
- Don't plan to "just use adapters" as a default; treat adapters as a last resort with clear current limits.
- For new high-draw GPUs, prefer a PSU that natively supports the required connector standard.
-
Decide headroom based on transients and upgrade intent
If you're close to the PSU's comfortable zone, step up one wattage tier. This reduces fan noise, keeps the PSU cooler, and improves stability during sudden GPU load spikes.
Fast mode: a 60-second PSU decision algorithm
- Estimate base load: CPU sustained + GPU board power + one extra block for everything else.
- Add headroom: pick the next tier up for spikes and future GPU upgrades.
- Validate +12V: ensure +12V watts comfortably exceed your estimated real load.
- Validate connectors: EPS + PCIe/12VHPWR counts match your parts with no risky adapter plan.
- Choose a reputable line: 80 Plus guides heat/noise, not quality-prioritize protections and proven platforms.
Modular, semi-modular and fixed cables: choosing for airflow and cable management
If you're deciding PSU modular ซื้อที่ไหนดี, first decide whether you actually benefit from modularity. Modular is most valuable for tight cases, clean airflow, and frequent maintenance; fixed cables can still be fine in roomy cases with good cable routing.
- Modular makes it easier to route only the cables you need (cleaner airflow around GPU/CPU cooler).
- Semi-modular keeps essential cables fixed (ATX 24-pin, EPS) and lets you add PCIe/SATA as needed.
- Fixed cables reduce user error risk (fewer "wrong cable" incidents) and can be cost-effective.
Result check (use this before you commit to a PSU model):
- The PSU fits your case (ATX/SFX length) without blocking front radiators or drive cages.
- You have the right CPU EPS connectors (4+4) for your motherboard.
- You have enough GPU power connectors for your GPU without daisy-chaining when the GPU vendor discourages it.
- For modular PSUs: you will use only the cables that came with that exact PSU model/series.
- Cable lengths reach cleanly (especially in tall cases with bottom-mounted PSU).
- Airflow path stays open (no cable bundle pressed against GPU fans).
- You can close the side panel without crushing cables against connectors.
- You have a plan for SATA/Molex devices without overloading a single cable run.
Common PSU failure modes and preventive checks
- Mixing modular cables between PSUs: same connector shape does not mean same pinout; this can instantly kill drives/GPU.
- Underestimating GPU transients: a "just enough wattage" PSU can crash under sudden load spikes even if averages look fine.
- Using the wrong CPU cable: plugging PCIe 8-pin into EPS (or vice versa) is catastrophic-verify labels at both ends.
- Loose EPS/PCIe seating: partial insertion causes heat, arcing, and random shutdowns under load.
- Too many devices on one SATA chain: voltage drop and melted connectors can occur with high-draw accessories.
- Dust-clogged PSU intake: higher temperatures increase fan noise and reduce component lifespan.
- Cheap adapters as a default plan: low-quality splitters/extensions can add resistance and heat.
- No surge/voltage protection mindset: unstable mains can stress a PSU; at minimum use a quality surge protector, and consider a UPS if your area has frequent drops.
Step-by-step safety and installation checklist before first boot
Use these alternatives depending on your situation; pick the one that matches your risk level and time.
-
Standard careful install (recommended for most builds)
- Power off at the wall, switch PSU to O (off), and discharge static.
- Mount PSU firmly; orient fan to a clear intake (case vent + filter when available).
- Connect ATX 24-pin and CPU EPS first; then GPU PCIe/12VHPWR; then SATA peripherals.
- Route cables to avoid fan blades and sharp bends at connectors.
- Double-check every connector is fully seated; then switch PSU to I (on) and boot.
-
Extra-safe first power-on (use for expensive GPUs or new-to-you parts)
- Do a visual short check: no loose screws, no standoffs touching the board where they shouldn't.
- First boot with only essentials: motherboard, CPU, 1 RAM stick, boot drive, GPU (if no iGPU).
- Enter BIOS and confirm voltages/temperatures look normal before installing extra drives and accessories.
-
Swap/upgrade workflow (when replacing an existing PSU)
- Remove all old PSU cables completely (especially modular cables).
- Install the new PSU and use only its included cables.
- Re-check GPU power: avoid reusing old extensions if they were heat-stressed or kinked.
-
When to get help (fastest risk reduction)
- If you smell burning, see discoloration on connectors, or the PC shuts down under load repeatedly-stop and have a technician diagnose.
- If you're unsure about 12VHPWR/12V-2x6 routing and bend radius-get assistance rather than forcing the cable.
If you want a starting point for แนะนำ PSU สำหรับเกมมิ่ง, prioritize a reputable PSU line with strong +12V output, correct native GPU connectors, full protection features, and a wattage tier that leaves headroom-then pick the cable style that best fits your case and maintenance habits.
Quick answers to practical PSU dilemmas
Is a higher wattage PSU always safer?
No-quality and protections matter. Choose enough wattage with headroom, then prioritize a proven platform and strong +12V capacity.
Does 80 Plus Gold mean the PSU is "high quality"?
It mainly indicates efficiency at specific loads. Use it to estimate heat/noise, but still evaluate protections, +12V output, and build reputation.
What's the quickest way to answer "คำนวณวัตต์ PSU ต้องใช้กี่วัตต์"?
Add CPU sustained + GPU board power + a platform block, then move up one tier for headroom. Verify the +12V wattage supports that number.
Can I reuse modular cables from my old PSU?
Do not reuse them unless the manufacturer explicitly states cross-compatibility for your exact series. Same-looking connectors can have different pinouts.
When is a modular PSU worth it?
When your case is tight, you care about airflow, or you service the PC often. Otherwise, semi-modular or fixed can be simpler and cheaper.
Why does my PC shut down during gaming after I buy a new GPU?
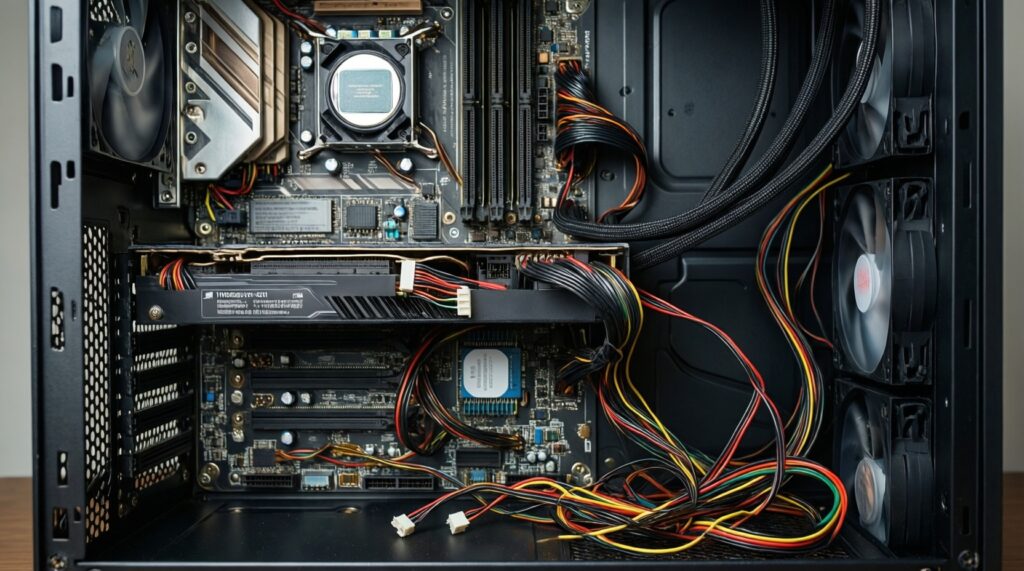
Common causes are insufficient +12V headroom for spikes, loose PCIe/EPS connectors, or using splitters/adapters that overheat. Re-seat cables and reassess PSU tier.
Where should I focus when I compare "พาวเวอร์ซัพพลาย 80 Plus ราคา" in Thailand?
Compare connector support, warranty/support convenience, and the PSU line's reliability track record first; treat 80 Plus as a secondary filter for heat/noise.